Showing posts sorted by relevance for query deconstruction. Sort by date Show all posts

Wednesday, January 15, 2020

Deconstruction

On August 21, 2015 I bought a basement - with a house above it for the new location of the WWSL. The move from the previous location with quickly - a matter of hours in fact, as the railroad was in storage.

Now wiser heads will tell you that its best that your railroad room be empty during deconstruction and construction - and I knew it - but anticipation got the best of me and things started quickly.

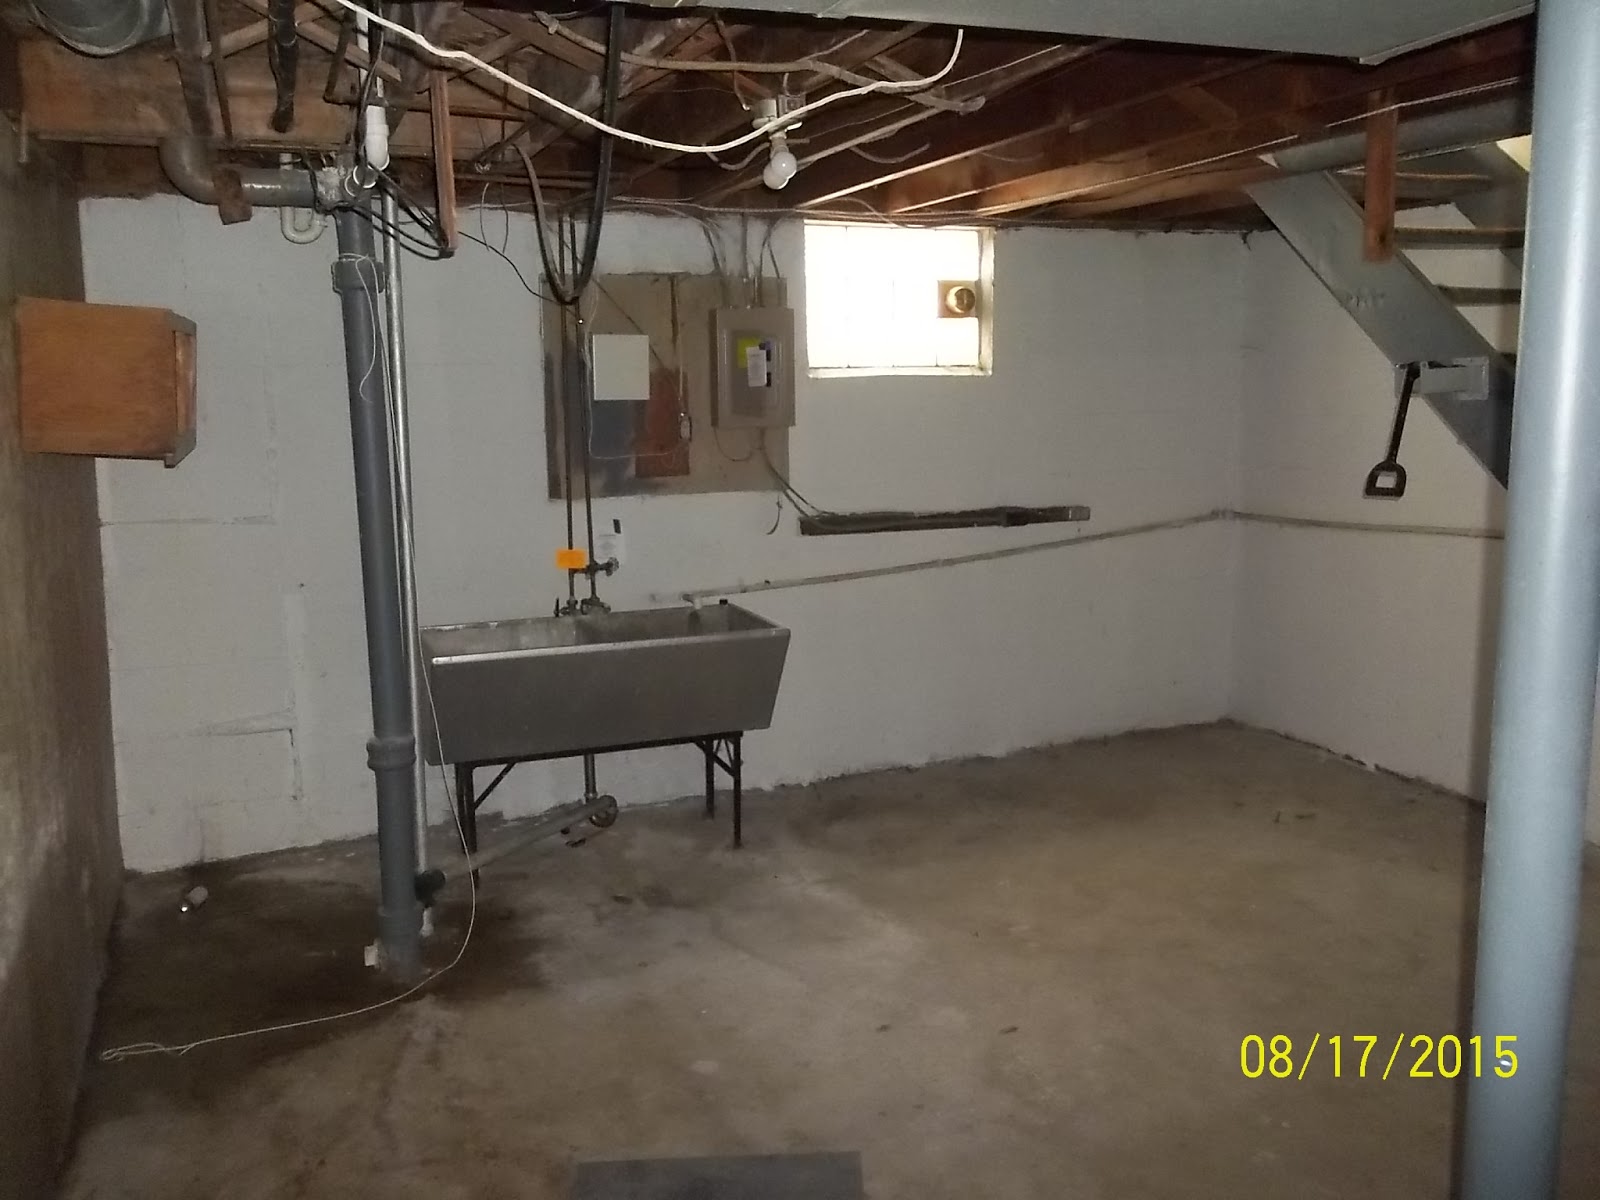
The original basement (25' by 30') was divided into 4 sections and two sections were partially paneled. That paneling was backed with a 1x2 stud wall - adequate for cedar paneling but not a railroad.


 I quickly tore out the walls and the paneling found a new home somewhere else.

Half the ceiling was finished with drywall and mineral fiber based ceiling tiles. As expected, the ceiling tile was disintegrating, stained or missing. The drywall and ceiling tiles were torn out and disposed.

Not shown is a partially tiled floor - that too was demolished for future replacement by indoor/outdoor carpeting.


Sunday, September 27, 2020

Layout Details - Construction Overview

Layout Details. Layout details identifies the specifics xxx. It is broken down into two main elements: 5) track planning and 6) construction. Construction consists of four subsets:

a. Human Factors. This basically answers what you want your layout room to be able to do when you are finished.

b. Lighting and Electrical. This section identifies the general and layout specific needs in terms of lighting and electrical.

c. Room Preparation. This identifies the deconstruction and construction to be done's (TBD) that need to be done.

d. Benchwork. Finally! When everything else is done, this section identifies what type of benchwork needs to be constructed.
 
Human Factor. Here are the areas for consideration. 
  • Access to Utilities. Access to set tub, washer and dryer connections. Access to electrical panel, basement drains, and water meter. Access to furnace and water heater. Here were my utility locations. 
  • Crew Lounge. A crew lounge was a luxury I wanted, even though I am a lone wolf modeler. I anticipate recruiting a crew and opening the layout to tours at some point of  time. Combining the Crew Lounge and the Utilities area made alot of sense!
  • Good Storage. I wanted a lot of general storage under the layout.

  • Large Aisles. I'm NOT a fan of small aisles. Been there done that. I like large open areas to work and move through.
  • Clean area. Drywall ceiling, painted walls, and indoor outdoor carpeting.
Lighting and Electrical
 
  • Good Lighting. The original basement had 4 100 watt light bulbs. I wanted 4 total general  lighting zones in the basement, and and an outlet for each of my layout lighting zones. I needed to add nine light switches to control all the lighting zones.
  •  
  • Improved Electrical. There were only two wall outlets in the original basement configuration. I wanted at least two outlet boxes on each wall. I added 6 circuit breakers to my circuit breaker box in anticipation of layout lighting and power needs. 
Room Preparation. 

Deconstruction of the layout space. This is what I had when I went downstairs to the future layout room: Layout Room (Before)

Constructing the layout space.  There is a theory of construction. Of course I didn't follow the construction concepts below for a variety of reasons, including stupidity. If you want to see what not to do read my construction articles beginning here Room Preparation.

  • Empty the space. Working around storage piles, etc is counter-productive time wise.
  • Start at the top and work your way down. This means install all the electrical and lighting in the ceiling, add whatever cable or plumbing requirements, etc.
  • Drywall the ceiling. I found based on my existing basement height, and my desire for valences, that a drop ceiling would not be ideal. All major plumbing raceways are open to repair - the raceways are covered with luan plywood for ascetics. 
  • Work from the outside of the space to the inside.  Fill all cracks in the wall as required. Paint the concrete walls with waterproofing paint.
  • Build interior stud walls (outside walls first, then interior walls).
  • Add electrical and cable wall outlets as required.
  • Drywall as desired.
  • Carpet the floor.

Benchwork
 
WWSL vers.3.0 is salvaged from vers 2.0. I will be using a stud wall, L-Girder frame work and panel type benchwork. See 3.0 Construction for specific details

Wednesday, February 19, 2020

Benchwork 2

There is an old carpenter axiom "measure twice, cut once". There's also an idiom "one step forward, two steps back". So it was in my initial wall construction.

I got the first two walls up using the compression-stud benchwork in my last post (http://modelingthewwsl.blogspot.com/2019/02/benchwork-1.html). I then went out and rented a laser leveler to locate the zero elevation line and mark the studs so I could then install the lrear lower level L-girder and the luan backdrops. I was able to quickly do two wall, the leftmost 30-foot wall and one 12-foot wall.

When i installed the 4'x8' foot luan backdrops i noticed they didn't line up vertically as well as I expected. I pulled the 4-foot level out and ran it along the top of the backdrops and was surprised to see that they weren't level - the bubble wasn't close to center in the tube.

I went to the rental company and re-rented the laser leveler. This time I went to the web site and downloaded the instruction manual and read it. Imagine my surprise when I read on the last page that the laser was accurate to 5/8 inch at 50-feet. Review of other brands of laser levelers of varying prices revealed accuracies of 1/8" to 1/4" per 30-feet.

I discussed this with a contractor friend of mine who confirmed that level varies by price, and by the care of the leveler by the owner. His leveler was accurate to 1/16th inch in 100 feet, and he said it was well worth the cost for his construction needs. He expressed surprise that I had gone to the expense of a laser leveler for such a small area. He reminded me that a low tech high accuracy tool in my garage would do just as well - a chalk line and a torpedo level!

Being the friend he is, he brought his expensive laser leveler over and shot the new zero elevation line. Sure enough my 30-foot wall was 1/2 inch off - my chalk line and torpedo level 1/16th off.

I can accept a deviation of 1/16th inch. So back to deconstruction and reconstruction.


Sunday, December 15, 2019

Welcome to the Olympic Peninsula in western Washington State and the WWSL

Whether it's the busy Chehalis River industrial metropolis of Montesano, the rainy stations of Wickwood and Headquarters, or the funky logging camp and company coal town in the forests of Coal Grove - I hope you find something to enjoy looking at and that it stokes your fires for freelance prototype model railroading.

What do I mean by freelance prototype? Well you wont find the Western Washington Short Line referenced in any books, magazines or railroad historical societies, or located on any map except the one here. The WWSL is a fictional Class III railroad, occupying a real logging railroad right of way originally built by the Schaefer Brothers Lumber Company in the early 1900's, with its own alternate history blended into the real economic and social history of Gray's Harbor County. Right of Way, operations, motive power and rolling stock are adapted from prototype diagrams, plans, standards and usage whenever possible, modified when the necessities of modeling interfere with reality. I'll footnote reality whenever possible.

All individual and company names used in context of the Western Washington Short Line, unless specifically identified, are fictional, some even humorous if you notice it, and as the movie trailers say - any resemblance to people living or dead is purely coincidental.

As of August 21, 2015 I have bought a basement - with a house above it for the new location of the WWSL. Armchair railroading has ceased, deconstruction has taken place and construction has begun! I am presently looking for local model railroaders interested in construction and operations to join me in bringing the WWSL back to life - no experience necessary!

The email connection is so you can make comments, suggestions, or ask questions. Connecting and learning from one another is a large part of what has always made model railroading such a great hobby. When construction reaches an operational state, visitors are welcomed to stop by to see (and hear) the WWSL in person. Use the email connection to make arrangements.

S. B. (Stan) Clinard
President and Chairman

Dayton, OH

Wednesday, January 22, 2020

Room Preparation 1

After deconstruction was complete the basement was surveyed to determine what needed to be done before the railroad was installed.

I needed to construct one interior wall separating the utility room (Zone 1) from the remainder of the railroad room. The Dispatcher's Desk would located on one side and the Workbench and supply shelves located on the other side.

The foundation about the sill needs to be insulated with 1/2 inch styrofoam and R19 fiberglass insulation.

One crack needs to be repaired in the south foundation wall.

All concrete foundation walls need to be painted with waterproofing paint. 

The basement was initially lit with 4 ceramic sockets each with a 100w incandescent light bulb. Those 4 bare bulbs are to be replaced by 8 Can lights with LED lamps for general illumination (4 switched circuits).

The ceiling needs to be drywalled to reduce dust infiltration from the open rafters.

A basic frame wall using 2x4's and 2x6's needs to be installed along each wall and down the center line to support the layout's backdrop and L-Girder framework.

Electrical outlet's need to be installed along the outer and center peninsula framing.

The electrical circuit box needs to have 4 additional circuit breakers installed for layout lighting circuits.

A carpeted floor needs to be installed for operator comfort and for overall appearance.