Project Process
Laying out a Reverse curve
1. Pre-Installation Process - Track Preparation. See 4.2.3
Straight Track for the standard track preparation process.
Rail end checks. No changes or additions.
Tie spacing. I
do not change tie spacing on curves. There is no significant visual
difference between WWSL Standard 1 and Standard 2 on curved track.
Track cleaning. No change or additions.
Individual spare ties. No change or additions.
2. Installation Process
I
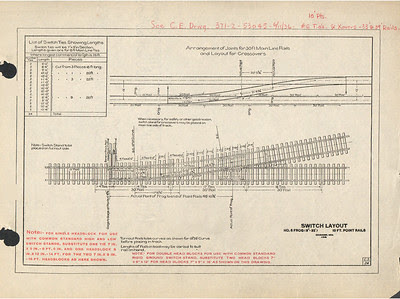
use Shinohara turnouts. The turnouts have a divergent track curve
within the turnout itself, however from the turnout frog to the end of
the turnout, the track is straight.
One of the
issues I had in previous WWSL versions was the curvature of the track
into the passing track. The curvature is an "S" curve and can cause
derailments with longer length rolling stock. On the prototype there may
be a curve but the easiest way to layout the curve is to template that
curve as you would for a two track crossover.
In
this case I placed the mainline turnout about centered on the test
section, then used two turnout templates to determine the curvature. The
second No. 6 turnout is on aligned to the passing track, connect
the two switches with a straight track, moving the passing track turnout
to align, then cut in the layout lines for
the track. No fuss, no muss and no trying to ease the curve into the
passing track.
Join Track Sections. There are several changes or additions when laying out the reverse curve track. Getting a smoothly flowing
connection between tangent (straight) track and the curved track is difficult. The outward
pressure of the rail at the joint often creates a kink.
I install the turnout per 4.2.5 Turnouts. I place the moveable rail on the outside of the divergent turnout track.
I used a Ribbon Rail straight templates to form the tangent. I then use tthe appropriate Ribbon Rail curve radius
template to curve the flextrack section. I then take this
piece to the layout to install on the curve. I do an initial fit to see
what works and doesn't work. This usually involves shifting both the straight template and the reverse
curve template outward to meet the point of tangentcy.
Glue Down. I
layout the curve using the track templates instead of a straight or
curved edge. The tangent part of the divergent track is then layed out
along the straight template.
Tie Gaps. Fill those gaps at the rail joiner with the replacement ties.
Rail Gaps. There
are NO rail gaps in the reverse curve. The rail gaps are
located on the straight sections several inches on either side of the
curve.
Laying out the reverse curve.
then the easement, then the curve radius, then a second easement. Repeat on the other end of the tangent.


No comments:
Post a Comment